



Written by Rick Kovac, COO of Golden Lighting
The takeaway: An outdoor ceiling fixture comes down to three decisions made in order — the location's real wet/damp exposure, a mount format that fits the ceiling's clearance and glare needs, and an output package sized to the space — and getting those three right prevents the water damage, glare, and underlit-porch complaints that come from picking on looks alone.
Key takeaways:
- Match the location rating to actual exposure, not appearance: damp-rated fixtures suit a solidly covered porch or soffit, while an open pergola or anywhere wind-driven rain can reach needs a wet-rated fixture.
- Choose flush, semi-flush, pendant, or recessed based on ceiling height and glare control first, then pick the finish.
- Target 800 to 1,100 lumens for a typical 8-foot porch and 1,200 to 1,800 lumens for a larger or higher covered patio, in warm 2700K to 3000K light.
- A weather-rated junction box, correctly bonded grounding, and an LED-compatible dimmer matter as much as the fixture itself — mismatched components, not a bad fixture, cause most post-install failures.
A covered porch can look beautifully finished in daylight and still fail at the moment it matters most. At dusk, a single wall sconce may throw hard shadows across the ceiling while the seating area stays dim, leaving someone fumbling for keys or moving carefully around a patio table. The right LED outdoor ceiling lighting changes that experience by putting controlled, even illumination where the space actually needs it.
Golden Lighting approaches outdoor fixtures as part of the architecture, not as an afterthought. The fixture must suit the ceiling height, tolerate the exposure, deliver comfortable light, and avoid sending glare into guests' eyes or light into a neighbor's windows. The recommendations below focus on those decisions in the order that prevents expensive mismatches.
Why Your Covered Outdoor Space Feels Dark and How Ceiling Lighting Fixes It
A covered porch often feels dark because the ceiling creates a shadow plane above the room. Wall lights illuminate the vertical edges, and ground-level fixtures brighten the path below, but neither source distributes light across the full overhead footprint. The result is a porch that feels enclosed even when it has generous dimensions.
A ceiling-mounted LED fixture solves the geometry problem. It sends light downward from the center or a deliberate position above the seating, dining, or entry area. That placement reduces the silhouette effect created by side lighting, so faces, steps, and door hardware are easier to see without forcing the fixture to produce excessive brightness.
The same principle applies to a pergola, a soffit above a patio, or a covered outdoor kitchen. In any of these larger entertaining zones, roofing, ceiling depth, and electrical planning all shape where the fixture can go and which location rating it needs — decide those details before the ceiling closes up, not after.
Treat comfort as the primary lighting target
The best fixture doesn't just make the porch brighter. It makes the porch more usable.
- Even coverage: A broad downward distribution reaches seating and walking areas instead of creating one bright pool directly below the fixture.
- Lower visual strain: A diffuser or shield keeps the LED source out of direct view.
- Better orientation: Light from above reduces the harsh facial shadows common with wall-mounted fixtures.
- Longer usability: Comfortable illumination helps the outdoor room function after sunset without feeling like a utility zone.
Professional view: A porch rarely needs the brightest fixture available. It needs light in the right position, with the right shield and the right control.
LED technology has become central to this transition. The U.S. Department of Energy reported 51.4% LED penetration in outdoor lighting, compared with 29.8% indoors, according to the DOE LED Adoption Report. A separate DOE comparison of outdoor area luminaires found LED replacements saving 114 kWh, or 26.8%, and 215 kWh, or 50.6%, per fixture per year against a 70W HPS baseline, depending on the replacement design, per the DOE LED Outdoor Area Lighting fact sheet. For a porch or patio, the practical conclusion is straightforward: select the fixture for coverage and comfort first, then use LED efficiency and controls to keep operation sensible.
Choosing the Right Fixture Style for a Porch or Patio Ceiling
A low porch with an exposed bulb creates glare and head clearance problems, while a tall covered terrace can support a fixture that shapes the room. Choose the mount for control and comfort first, then select a finish that supports the architecture.
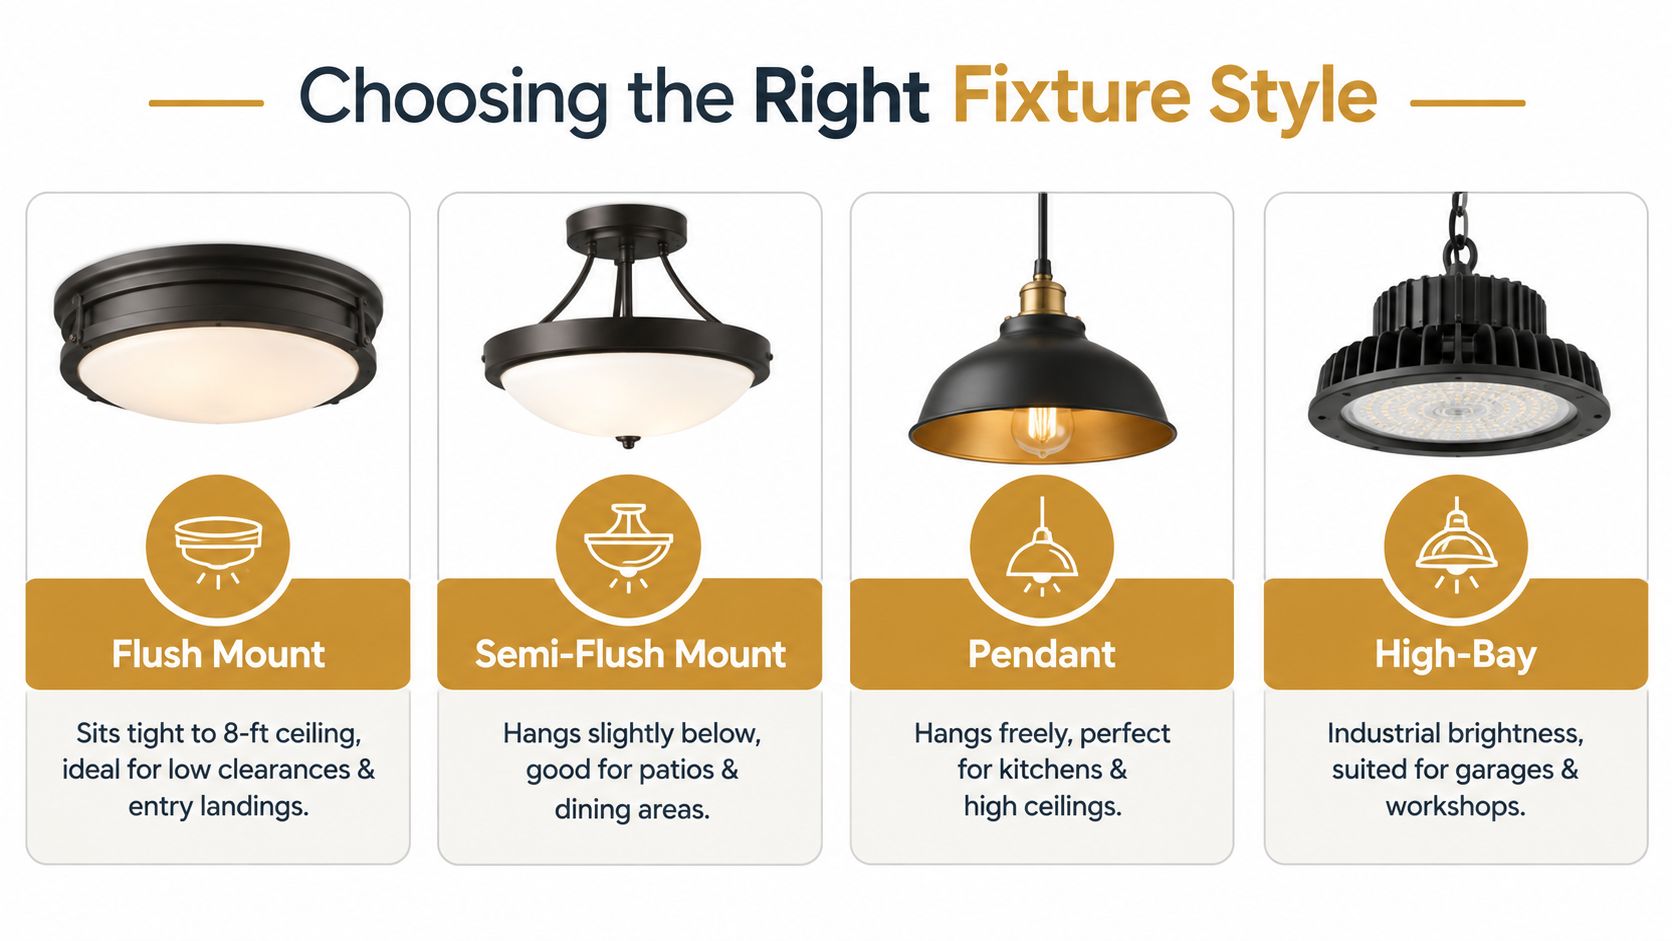
Match the mount to the clearance
Flush mounts sit close to the ceiling and remain the safest default for a standard 8-foot porch. Use them at entry landings, narrow walkways, and circulation areas where a hanging fixture could obstruct movement. Select a model with a diffuse lens or shield so the LED source does not shine directly into occupants' eyes.
Semi-flush mounts project roughly 4 to 7 inches. That modest drop gives the fixture more visual presence and places the light source farther from the ceiling, which can improve distribution across a deeper seating area. Choose this style when the ceiling has enough vertical clearance for decoration without the reach of a pendant.
Outdoor-rated pendants belong on taller ceilings with a defined zone beneath them. A drop of 12 inches or more suits a vaulted porch or an outdoor dining table, particularly when the ceiling rises above 10 feet. Keep the fixture clear of head movement, use a covered light source, and aim the illumination at the table rather than at seated faces.
Recessed fixtures provide the cleanest modern appearance because they sit within the soffit. They require suitable joist depth, insulation compatibility, airflow clearance, and trim listed for the actual outdoor exposure. If the soffit was not designed for recessed equipment, a surface-mounted fixture is the safer and more practical choice.
For proportion and placement ideas, this guide to ceiling porch lights provides a useful design reference.
Make the style decision
- Choose flush for low clearance, entry areas, and strong glare control.
- Choose semi-flush when the patio has more ceiling depth and needs a visible design feature.
- Choose a pendant for tall or vaulted architecture above a defined table or lounge zone.
- Choose recessed only when the soffit construction supports safe, listed installation.
A classic finish, a clean diffuser, and restrained proportions usually remain useful longer than an oversized decorative fixture. Coordinate the ceiling light with Golden Lighting's outdoor collection, then repeat related shapes or finishes indoors for a connected visual language. Let the structure determine the fixture, and use shielding and placement to keep the space comfortable after dark.
Wet vs Damp Location Ratings and Why the Label Matters
The location rating is the first technical check, not a footnote. A fixture installed outdoors must be listed and labeled for the moisture it will encounter.
A damp-location fixture can handle humidity, condensation, and indirect moisture. It's appropriate for a covered porch or screened patio where a solid roof or soffit protects the fixture from direct rain. A wet-location fixture has sealing intended for direct water exposure, including rain, snow, hose spray, or standing water.
The distinction matters under an open pergola. A homeowner may see a ceiling and assume the fixture is protected, but wind-driven rain can reach a partially open structure from several directions. A damp-rated flush mount in that position can allow water into the driver and fail prematurely.
Use the exposure, not the appearance, as the test
| Rating | Can Handle | Best Outdoor Location | Failure Risk If Misapplied |
|---|---|---|---|
| Wet | Direct rain, snow, hose spray, and standing water | Open pergolas, exposed soffits, and partially open ceilings | Water can enter seals or the driver if a lower rating is used |
| Damp | Humidity, condensation, and indirect moisture | Covered porches, solid soffits, and screened patios | Direct spray can overwhelm the fixture's protection |
| Dry | Interior conditions without outdoor moisture | Interior rooms only | Outdoor moisture can corrode components and cause electrical failure |
Practical rule: If water can strike the fixture, specify wet-rated. If only humid air or condensation reaches it, damp-rated is sufficient.
A wet-rated fixture can be installed in a damp location, but the reverse isn't acceptable. The wet-rated outdoor lighting guide provides a helpful product-selection reference, while the IRC outdoor lighting guidance explains the location logic in code-oriented terms.
Dry-rated fixtures shouldn't be installed outdoors just because a roof appears substantial. Labels, seals, and installation instructions determine suitability. When the exposure is uncertain, the wet-rated choice gives the installation more tolerance for wind, maintenance spray, and seasonal weather.
Sizing the Light With Lumens, Kelvin, and Beam Spread
Brightness should be calculated from the space, not guessed from the fixture's appearance. For an 8-foot porch ceiling covering less than 40 square feet, a practical target is 800 to 1,100 lumens. For a 9- to 10-foot ceiling or a larger covered patio, the target rises to 1,200 to 1,800 lumens.
Those recommendations should be adjusted by use. A fixture above a dining table or active seating area may need more usable output than a small entry landing. A higher ceiling also consumes more of the light before it reaches eye level, so the fixture needs a diffuser, a focused distribution, or a pendant that brings the source closer to the occupied zone.
| Ceiling Height / Space | Lumens | Color Temperature | Beam Spread |
|---|---|---|---|
| 8-foot ceiling, under 40 square feet | 800 to 1,100 | 2700K to 3000K | 100 to 120 degrees |
| 9- to 10-foot ceiling or larger patio | 1,200 to 1,800 | 2700K to 3000K | Broad, diffused distribution |
| Above 10 feet | 1,500+ | 2700K to 3000K | Diffuser or downrod pendant to push light downward |
| Utility zone or garage overhang | Task-dependent | 3500K to 4000K | Broad coverage with controlled glare |
Select light quality, not only quantity
A warm 2700K to 3000K source creates a comfortable porch atmosphere and coordinates well with wood, brick, and warm architectural finishes. The cooler 3500K to 4000K range belongs in utility-oriented locations such as garage overhangs or side entries where visual clarity outranks hospitality.
For ceilings under 9 feet, a 100- to 120-degree beam spread distributes light toward the perimeter rather than concentrating it below the canopy. Above 10 feet, a fixture rated at 1,500 lumens or more should use a diffuser or downrod pendant to bring useful light closer to eye level. A CRI of 80 or higher helps skin tones and entry details look natural.
The light bulb selection guide can help coordinate lamp characteristics where the fixture accepts replaceable sources. For integrated LED products, the specification sheet remains the controlling document.
Mounting, Wiring, and Weatherproofing an Outdoor Ceiling Fixture
Outdoor electrical work demands a sound mounting surface before any fixture is unpacked. The junction box must be code-compliant, weather-rated, and anchored to a joist or brace. Drywall alone can't carry the fixture securely or maintain a reliable weather seal.
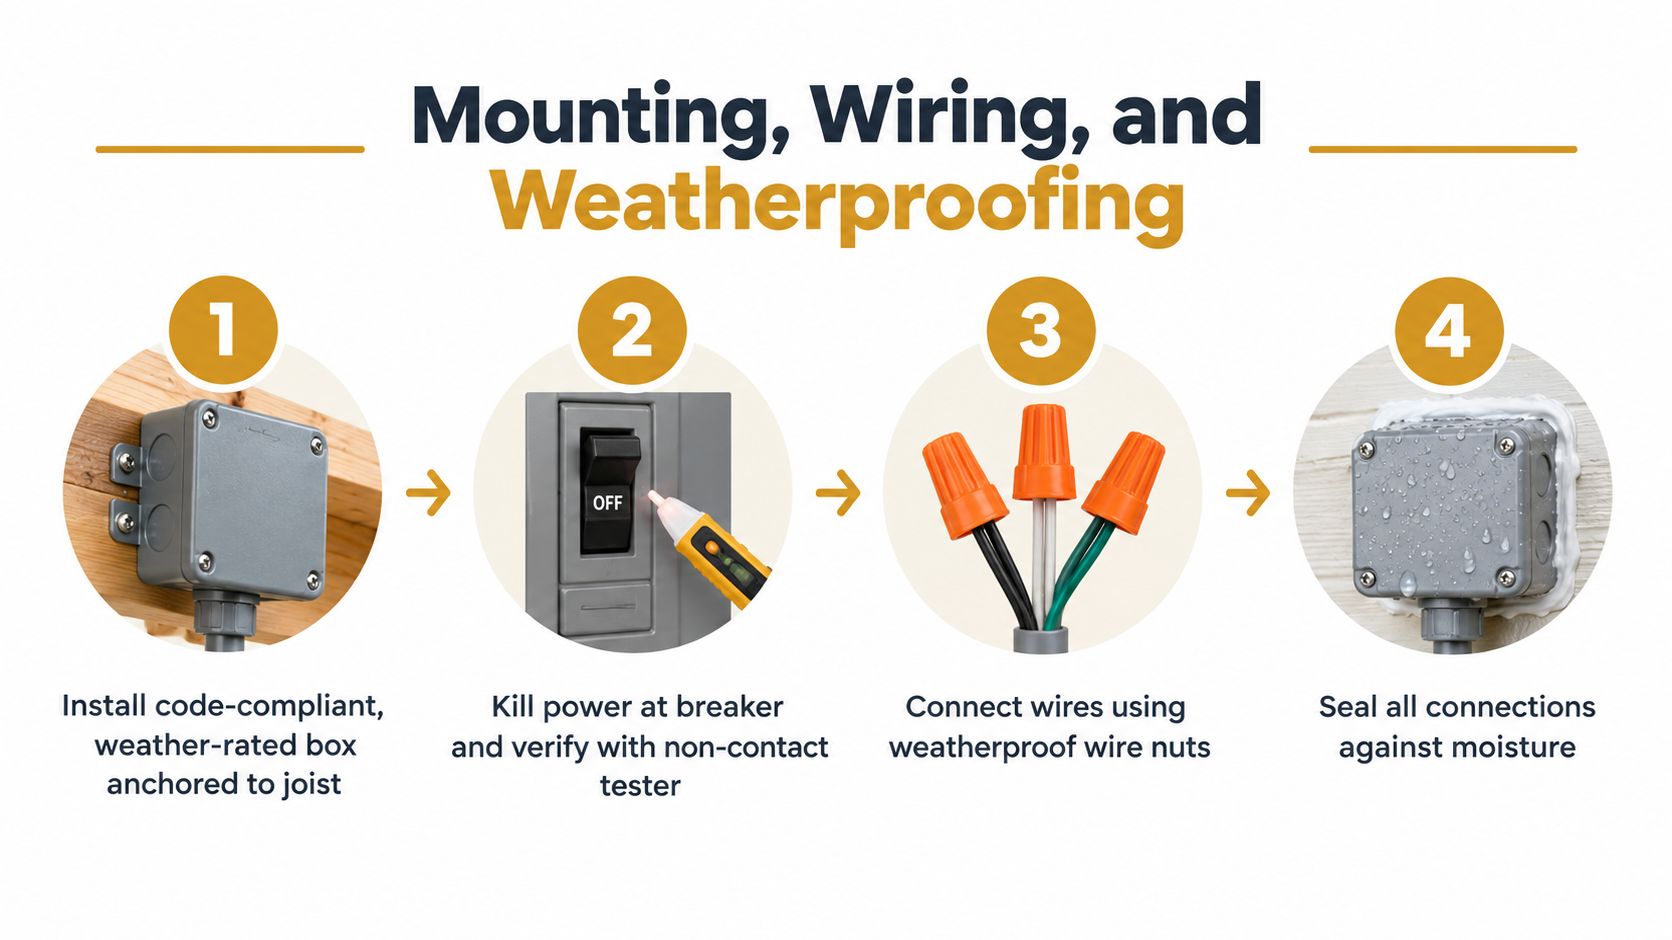
Follow a deliberate installation sequence
- Prepare the box: Install a weather-rated junction box and anchor it to framing. Confirm that the box flange will sit flat against the ceiling surface.
- Make the circuit safe: Turn power off at the breaker, then verify the circuit with a non-contact tester before touching conductors.
- Use suitable conductors: New runs should use UF-rated cable or THWN in conduit, as required by the installation conditions and local code.
- Bond the grounding path: Connect the grounding conductor to both the box and the fixture. Use weatherproof wire connectors suitable for the enclosure.
- Compress the gasket evenly: Place the fixture gasket against the box flange and tighten mounting screws in a star pattern. Uneven pressure can warp the seal.
- Seal the canopy correctly: Apply a continuous bead of exterior-grade silicone around the upper and side edges where the canopy meets the ceiling. Leave the bottom edge open so trapped moisture can drain.
- Pair the dimmer: Use only a dimmer listed as LED-compatible on the fixture specification sheet. An incompatible dimmer can cause flicker and stress the LED driver.
The seal is a system, not a single bead of caulk. A rated box, intact gasket, flat mounting surface, and correct canopy pressure all contribute to keeping moisture away from electrical components.
For a new circuit, uncertain grounding, or a difficult soffit, a licensed electrician can evaluate the installation before the fixture is mounted.
The following installation video can help a homeowner understand the sequence and identify questions for an electrician.
The U.S. Department of Energy's exterior lighting purchasing guidance lists a minimum luminaire efficacy rating of 126 for outdoor wall-mounted luminaires and recommends replacing older exterior fixtures rather than assuming a retrofit preserves the original moisture and dirt seals. The same logic applies above a porch. A complete listed fixture is generally the more dependable path than forcing an LED retrofit into an enclosure designed for older technology.
Glare Control, Dark Sky Habits, and Smart Controls Worth Considering
Glare is usually a shielding problem, not a lumen problem. A bright LED source exposed below a porch fixture can feel harsher than a lower-output source hidden behind a diffuser or a full-cutoff housing.
The most comfortable designs keep the LED module behind the diffuser plane and direct light downward. Recessed modules, deep shades, and shielded downlights protect the eye from the source while preserving useful illumination on the floor and furniture.
Build the control package around the space
A dark-sky-friendly porch fixture should direct light below the horizontal plane rather than sending it outward or upward. Warm color temperatures below 3000K are a practical preference for residential exterior use, and warm-dim capability gives the homeowner more control as the evening progresses.
Controls complete the design:
- Photocell or astronomic timer: Keeps the fixture off during full daylight and schedules operation around sunset.
- LED-compatible dimmer: Allows a lower setting for dining and conversation, with more output available for arrival and cleanup.
- Driver-matched control system: A 0–10V or ELV dimmer can work when the fixture and driver specifically support it.
- Motion sensing: A sensor can raise output when someone arrives while keeping a dimmed, low-glare standby level the rest of the time — check the specific fixture's rated detection range before relying on it for a large driveway or entry.
Those control details matter most in multifamily housing, hospitality, and managed properties. The valuable upgrade isn't always a higher lumen count. It may be a fixture that stays at a calm baseline, responds to occupancy, and avoids unnecessary operation.
Market direction supports that emphasis: industry reporting identifies glare reduction, dark-sky compliance, and wireless, connected-ready controls among the leading outdoor LED themes, per the Spherical Insights market analysis. The homeowner's takeaway is simple: choose the shield and control method before chasing extra brightness.
Your Next Step and the Three Decisions to Lock In Before You Buy
Before you add an outdoor ceiling fixture to your cart, lock in three decisions: location rating, fixture format, and output package. These choices determine whether the light suits the ceiling, handles the weather, controls glare, and keeps the space comfortable after dark.
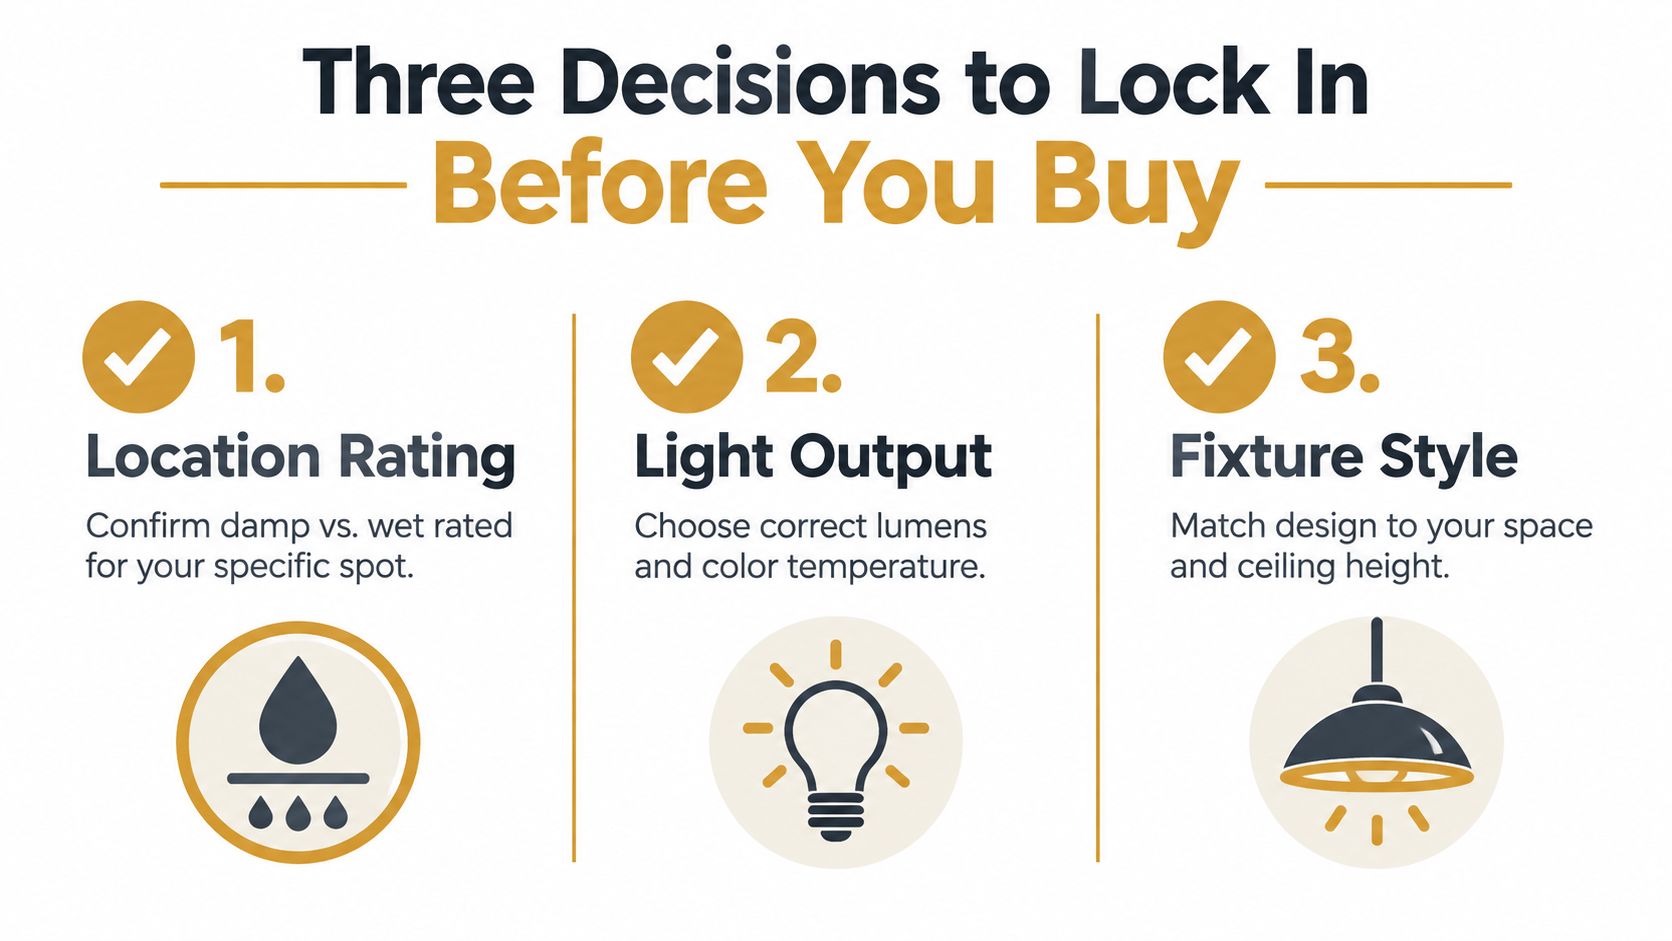
Decide the location rating
Check whether the fixture sits beneath a fully covered porch, an exposed soffit, or an open pergola. Choose damp-rated for protected areas exposed to humid air and condensation. Choose wet-rated when rain, spray, or wind-driven moisture can reach the fixture. Treat this label as a weather and safety decision, not a marketing detail.
Decide the format
- Flush mount: Best under 9-foot ceilings and at entries with limited clearance.
- Semi-flush mount: Adds visual presence when the ceiling has more depth.
- Pendant: Works where the architecture provides a clear hanging zone and at least 7 feet of headroom beneath the fixture.
- Sealed recessed fixture: Suits a properly constructed soffit with the required clearance and insulation compatibility.
Decide the output package
For most porches, select 800 to 1,600 lumens, warm-white 2700K to 3000K light, and a diffuser or shield that limits glare. Confirm dimmer compatibility before purchase. Measure the junction box and photograph the space at night, so you can judge the ambient-light problem instead of guessing.
For California projects, outdoor LED luminaires and LED light sources installed outdoors are exempt from the state's JA8 high-efficacy compliance pathway, according to the California Energy Commission's code guidance — that exemption is separate from whether a given fixture also qualifies as high-efficacy on its own, so local permitting and installation requirements still apply.
Choose a second matching fixture when symmetry matters at paired doors or across a wide covered terrace. Add the correct gasket and exterior-grade silicone to the installation list, allowing the work to be completed with the specified weather protection.
Golden Lighting offers outdoor options that can coordinate with the architecture and related sconces, pendants, or interior collections. Choose by rating, format, and output, then verify the controls and installation requirements before purchase. The right fixture manages exposure, brightness, and visual comfort together.
— seen a lot of light fixtures in 80+ countries. Still learning what actually works in a home.











Share:
Dimmable Under Cabinet Lights: Complete Installation Guide
New White Paper: The Golden Kitchen Layering Method