LED
Most recommended
EfficiencyLifespan
Low energy, long life, many shapes & color temps.
Dimmable
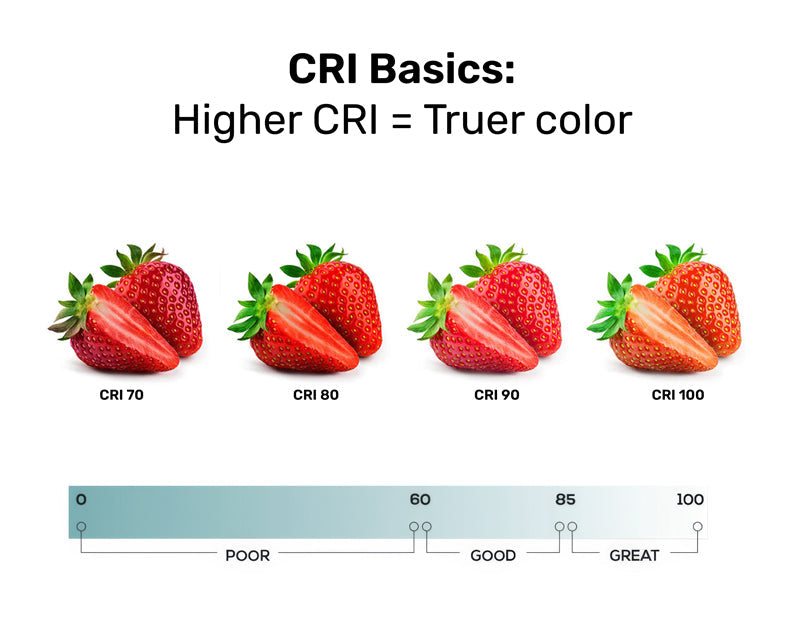
CRI 90+ options
All bases/shapes
Quick answers now, deep guidance when you want it—installation, dimmers, bulbs, finishes, reviews, and support.
QUICK REFERENCE
Golden Lighting is designed to layer light beautifully—and install easily. Start with the basics, then fine-tune dimming for the perfect glow.
Cut power at the breaker
Turn off power at the breaker before any wiring. Don’t trust the wall switch; verify with a voltage tester.
Confirm a rated junction box
Standard boxes support up to ~50 lb; use a box rated for heavier fixtures.
Dry-fit & set height
Adjust chain/rods before wiring so the final hang is perfect.
Mounting strap check
Many fixtures use a strap/crossbar—replace a damaged one and tighten hardware.
Wire it up
Black→black, white→white, ground→ground. Twist on wire connectors; tuck neatly into the box.
Add canopy & bulbs, then restore power
Slide the canopy to cover hardware; test at the switch.
Cut power at the breaker
Always turn off power and verify with a voltage tester.
Use an LED-rated dimmer
Match the tech to your load: TRIAC/forward-phase, ELV/reverse-phase, or 0–10V.
Check the load rating
Keep total fixture/bulb watts below the dimmer’s capacity; derate in multi-gang boxes.
Identify your wires
Label Line (hot), Load, Neutral, Ground (and travelers for 3-way).
Single-pole vs 3-way
Follow the diagram for your circuit; wire exactly as shown.
Set trim & test
Start at 100%, then lower slowly. Adjust the low-end trim to prevent flicker.
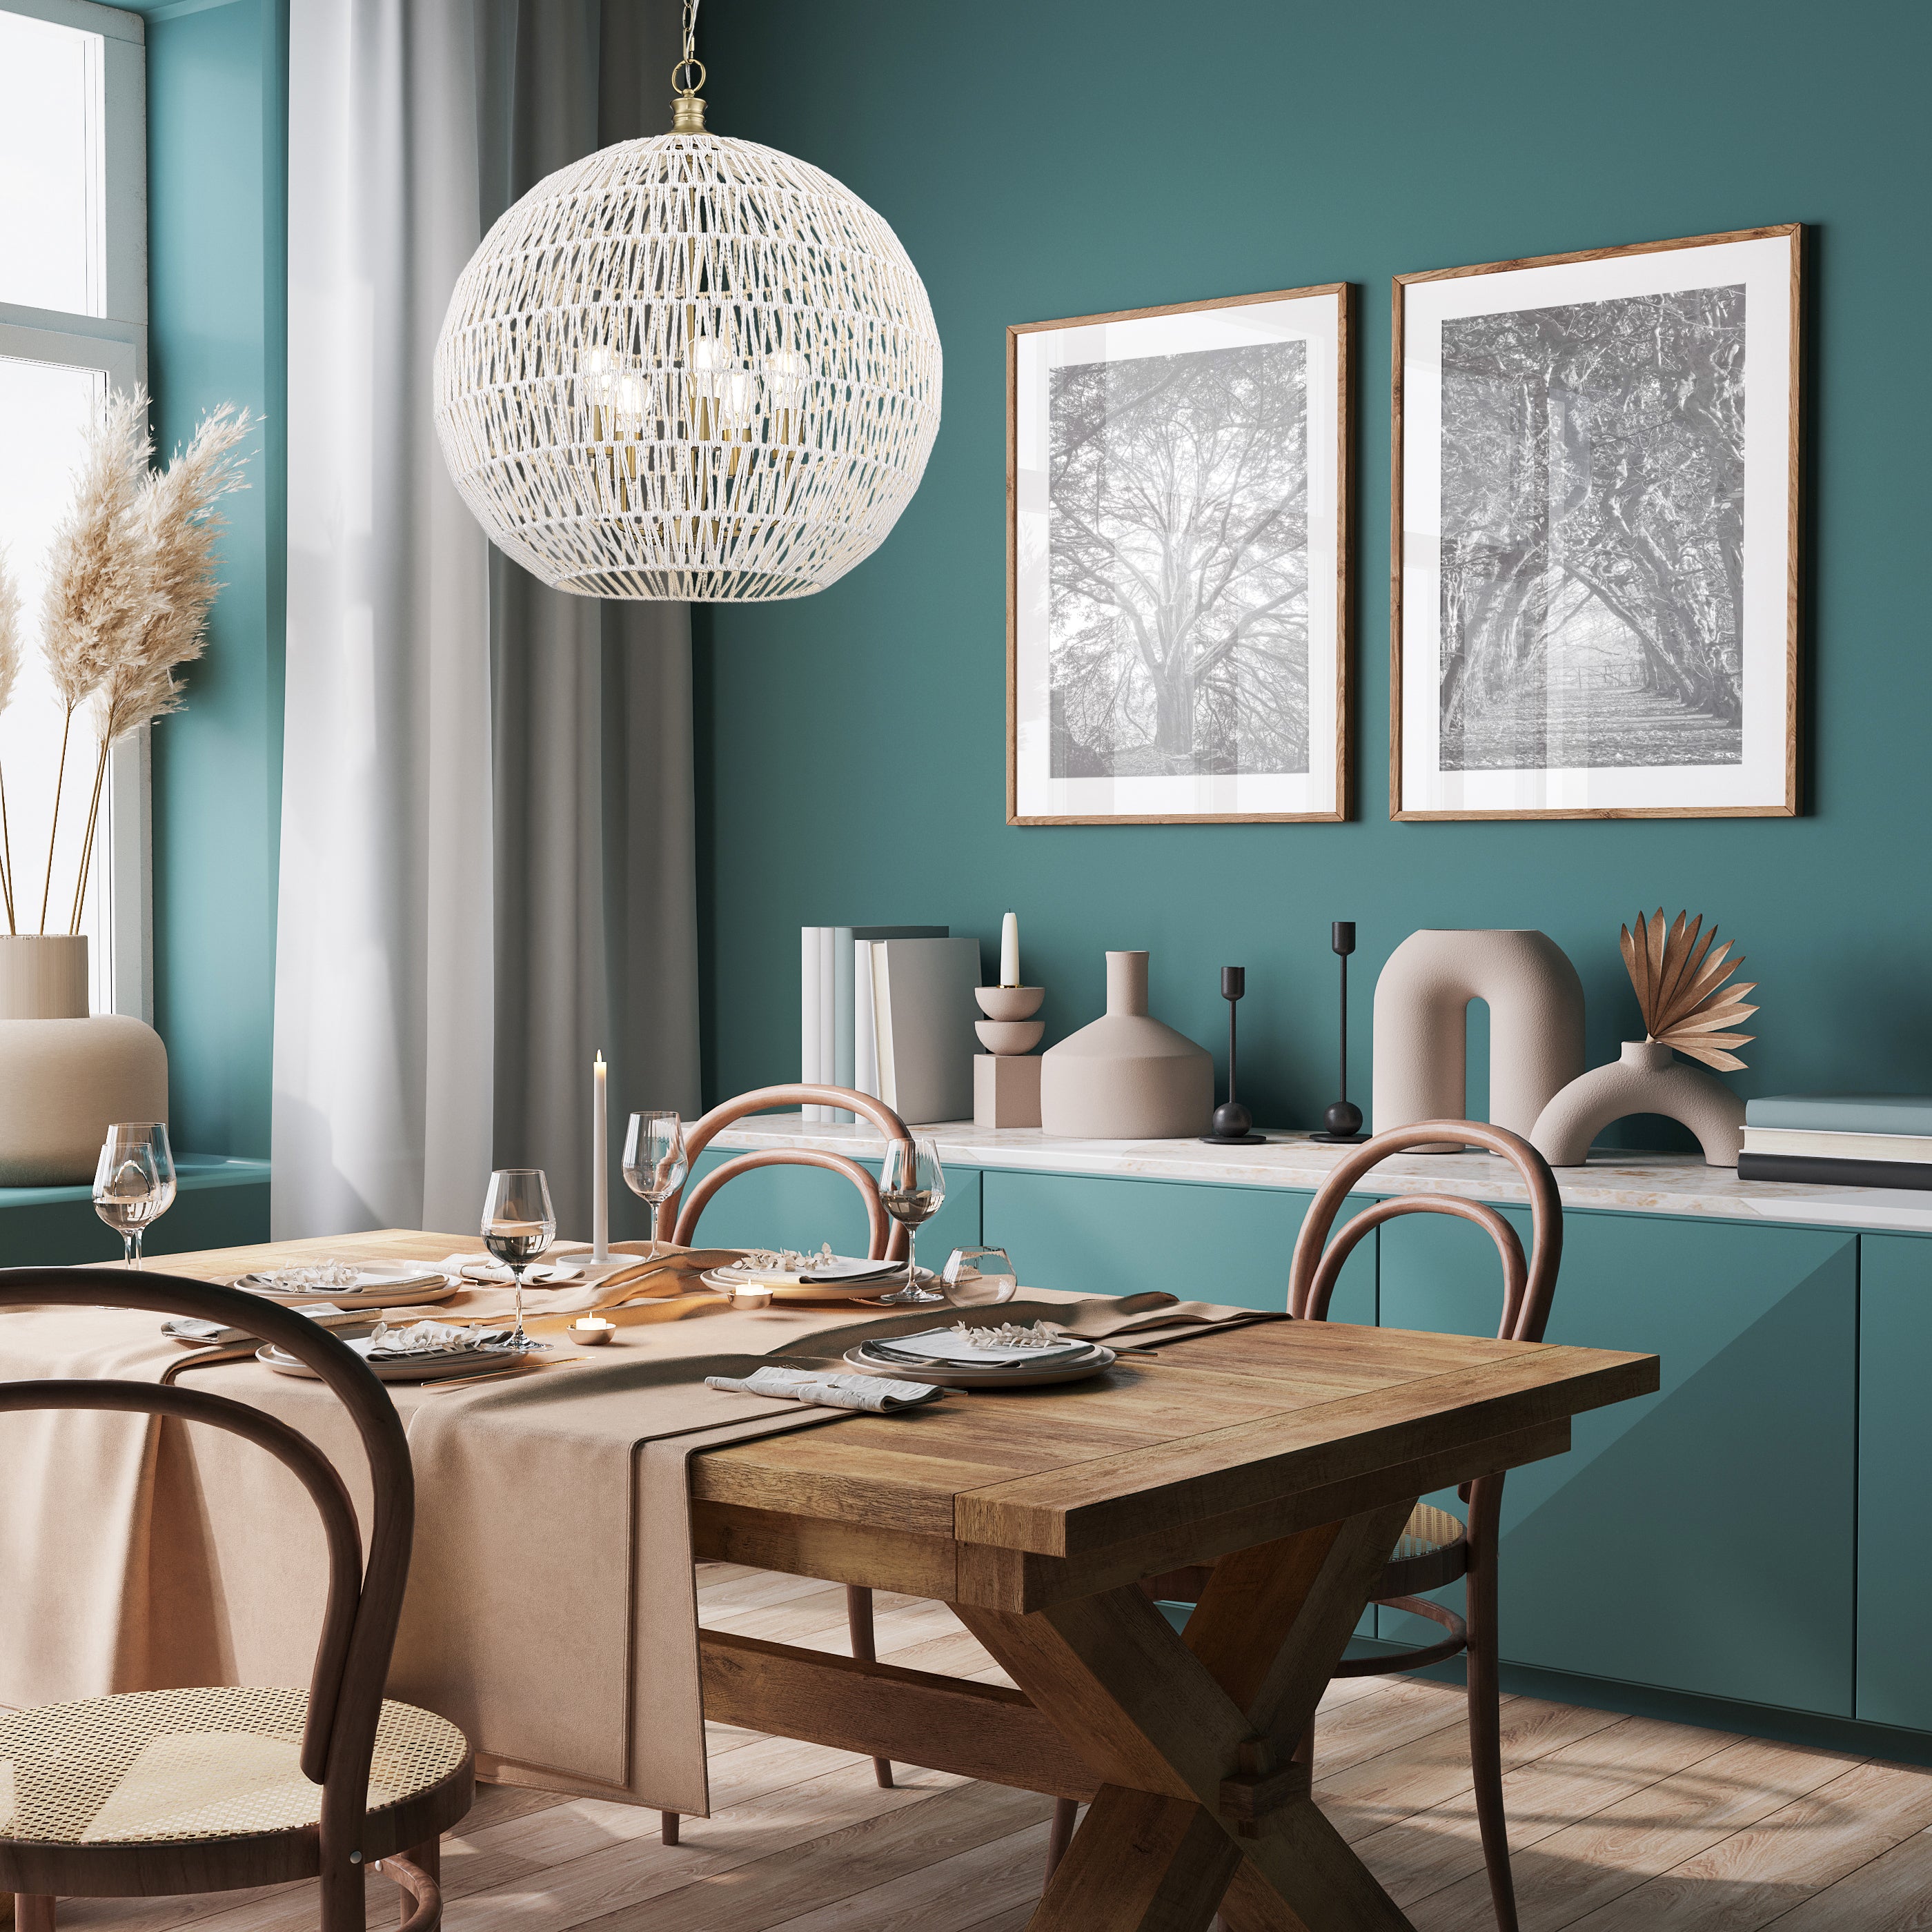
Here are some quick design guidelines to follow for selecting the right fixture for your spaces.
Adjust for fixture scale and sightlines across the table.
Balance task light with clear views across the workspace.
Keep pathways clear; scale up in double-height spaces.
These are shopper-friendly industry rules of thumb—tune for style and proportion.
Add the room’s length + width (in feet) and change that number to inches. That’s the **recommended diameter**.
| Room (L × W) | Sum (ft) | Diameter (in) |
|---|---|---|
| 10 × 10 ft | 10 + 10 = 20 | 20" |
| 12 × 15 ft | 12 + 15 = 27 | 27" |
| 14 × 18 ft | 14 + 18 = 32 | 32" |
Over a dining table, size to about ½–⅔ the table width for comfortable sightlines.
Multiply ceiling height (ft) by 2.5–3" to get the **overall fixture height** (inches).
| Ceiling Height | Formula | Fixture Height (in) |
|---|---|---|
| 8 ft | 8 × 2.5–3 | 20–24" |
| 9 ft | 9 × 2.5–3 | 23–27" |
| 10 ft | 10 × 2.5–3 | 25–30" |
| 12 ft | 12 × 2.5–3 | 30–36" |
Room 10 × 10 ft → 10 + 10 = 20 → 20" diameter. 8 ft ceiling → 8 × 2.5–3 → 20–24" fixture height.
Notes: These are shopper-friendly rules of thumb used by leading lighting retailers and design guides. Adjust for fixture style, scale, and sightlines.
Want a quick calculation to find your perfect fixture, try ours!
Diameter rule: length + width (ft) → convert to inches. Height rule: 2.5–3" per foot of ceiling.
Find the right glow fast—how bright (lumens), what feel (Kelvin), and which bulb/base to buy.
Start with dimmable LED, CRI 90+, 2700–3000K for most rooms.
Choose an LED-rated dimmer and set the low-end trim to prevent flicker.
Best for: most dimmable LED bulbs
Why: budget-friendly and widely compatible.
Best for: smoother, quieter dimming
Why: better low-end performance for premium LEDs.
Tip: use the same brand/model in a fixture for matching color & brightness.
Plus: start at 100% and dim down to check smoothness.
Bars show a quick read of Efficiency and Lifespan for each type.
Low energy, long life, many shapes & color temps.
Warm feel, higher energy use, short lifespan.
Bright, color-true light; runs hotter than LEDs.
Efficient but slower warm-up; some contain mercury.
Adjust color, schedules, and scenes via app/voice.
High output options (garage/work); specific sockets/drivers.
Tip: For most Golden fixtures, high-quality LED bulbs with CRI 90+ at 2700–3000K give a warm, flattering glow.
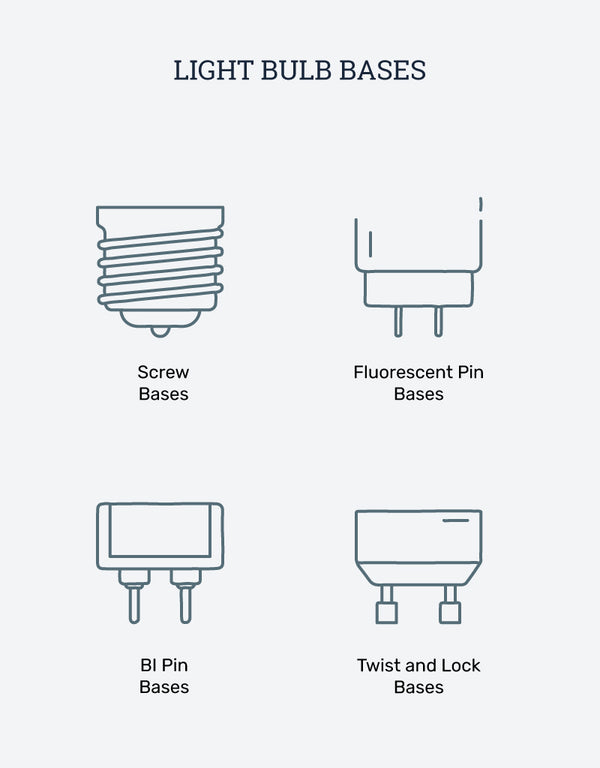
Match the base your socket needs, then pick a shape that suits the style. Click a base to see popular shape matches.
Most pendants, flush mounts, and standard chandeliers.
Chandeliers and sconces with candle bulbs.
Directional spots and some track heads.
Compact fixtures and many vanities.
All-purpose; diffuses well inside shades.
Visible filament for warm, vintage character.
Beautiful on vanities and open frames.
Sleek in linear sconces and pendants.
Classic chandelier & sconce look.
Focused beam for spots and accents.
Compact light source for sleek fixtures.
Statement look on vanities & pendants.

Keep your lighting looking sharp—and performing at its rated output—with simple, regular care. Alwaysswitch power offbefore cleaning, spray cleaner onto a cloth (not toward sockets), and use a soft microfiber with a touch of mild soap when needed—no abrasives or harsh solvents.
Use a soft microfiber cloth or feather duster to remove dust without scratching.
For stubborn smudges, lightly dampen cloth with water or mild soap—then dry immediately.
Spray cleaner onto the cloth (never the fixture) and avoid getting moisture in sockets.
No ammonia, bleach, vinegar, abrasives, or metal polishes on finishes or glass.
Wipe instead of soaking; rinse lightly if needed and dry fully to avoid water spots.
In coastal/salt-air areas, wipe fixtures monthly to prevent corrosion or film.
FOR LIGHT THAT LASTS
Dust and film mute great design. A quick wipe with a dry or lightly damp microfiber cloth keeps optics clear and finishes protected. When deeper cleaning is needed, use mild soap + water, and skip ammonia, alcohol, scouring pads, and metal polishes—especially on lacquered metals and acrylic. This approach aligns with common lighting-maintenance guidance and typical UL-listed care instructions.
IMPORTANT
Always turn power off and let bulbs cool before cleaning. Spray cleaners onto the cloth, not the fixture.