A room can be beautifully furnished and still feel wrong. The kitchen looks flat at night. The island becomes a shadow line instead of a workspace. A dining table feels disconnected from the rest of the room because the overhead fixture sits too high, too low, or in the wrong spot entirely.
That's usually where pendant lighting changes the story. A well-hung pendant doesn't just brighten a surface. It defines a zone, improves visibility, and gives the room a sense of intention that broad overhead light rarely delivers on its own. For homeowners, that means a space that works better every day. For creatives, it opens the door to mix-and-match expression. For professionals specifying product, it's where design and engineering have to agree.
At Golden Lighting, the view is simple. Good pendant placement is part art, part measurement, and part build quality. What works on the showroom floor also has to work after years of use, cleaning, adjustment, and daily life. That's why learning how to hang pendant lights correctly matters so much. A fixture should look right on day one and stay right for the long haul.
From Uninspired to Illuminated
A common scene plays out in real homes. The cabinetry is finished, the counters are in, the stools are chosen, and the room still feels unfinished. The problem usually isn't the palette. It's that the light doesn't shape the space.
Pendant lighting solves that with surprising speed. Over an island, it creates a visual anchor and gives task areas the focused illumination they need. Over a dining table, it lowers the center of gravity in the room and makes the setting feel more intimate and complete.
From a manufacturing and design perspective, placement is what turns a fixture from an object into architecture. A pendant that's too small disappears. A pendant that hangs too low interrupts sightlines. A pendant that's poorly mounted may look acceptable at first and slowly become the detail everyone notices for the wrong reason.
Practical rule: The right pendant doesn't fight the room. It clarifies it.
That's why the strongest results come from treating installation as a design decision, not the final chore on a renovation checklist. The finish, shade shape, cord drop, canopy fit, and alignment all contribute to whether the room feels calm and resolved or awkward and improvised.
The Art of Placement Planning Your Layout
A pendant can be beautifully made and still feel wrong the moment it is switched on. In nearly every failed install I have reviewed, the problem started at layout. The fixture was chosen before anyone confirmed height, spacing, sightlines, and scale.
Good placement solves two jobs at once. It gives the room usable light, and it makes the architecture feel settled. That is why I plan from the surface up, not from the ceiling down.
Start With Height That Supports the Room
For islands and dining tables, pendants usually hang 30 to 36 inches above the surface, and rooms with ceilings higher than 8 feet typically need about 3 inches of additional hanging height for each extra foot of ceiling height, a formula outlined in Civil Lead's guide to pendant heights and spacing.
Those numbers hold up because they respect a real trade-off. Bring the fixture too high and the light loses purpose. Drop it too low and you interrupt conversation, views across the room, and the calm visual line that makes a kitchen or dining area feel finished.
Walk-through spaces follow a different rule. Clearance matters more than intimacy. If you are working in a narrow passage or transitional zone, this Brisbane electrical guide for hallways is a useful reference for handling height and spacing without turning the fixture into an obstacle.
Build the Layout Before You Commit to the Drop
Multiple pendants need rhythm. Over an island, the eye notices uneven spacing faster than almost any finish mismatch.
A common target is 24 to 30 inches between pendants, but that number only works if the fixture diameter, island length, and edge setbacks all agree. I usually center the middle fixture first on a three-pendant layout, then place the outer pendants from that anchor so the whole composition reads as intentional.
These planning habits prevent expensive corrections later:
- Mark the true centerline of the surface. Use the island or table, not the room, as the reference point.
- Tape the fixture diameter on the ceiling. This exposes crowding and oversizing before any junction box is finalized.
- Check the room from lived-in angles. Look from the entry, prep zone, seating area, and adjacent room.
- Account for stool placement and reach. A pendant can clear the countertop and still feel too low over a seated guest.
For a more detailed reference on proportion, spacing, and fixture scale, see Golden Lighting's guide to sizing and placing a light fixture.
Use Proportion, Not Habit
A pendant should relate to what sits below it. A widely used guideline is that the fixture diameter should be about one-half to two-thirds the width or diameter of the surface beneath it. That range keeps the pendant visually connected to the table or island without letting it dominate the room.
Here is a quick planning reference:
| Location | Height Above Surface/Floor | Spacing Between Pendants |
|---|---|---|
| Kitchen island | 30 to 36 inches above surface | 24 to 30 inches apart |
| Dining table | 30 to 36 inches above surface | 24 to 30 inches apart |
| Hallway or walk-through area | Maintain clear walking clearance | Space for visual balance, not crowding |
From a manufacturing standpoint, placement also affects long-term performance. A fixture hung at the right height and in the right location is less likely to be bumped, twisted, or repeatedly adjusted after installation. That protects the stem connections, canopy fit, finish, and wiring path. Good layout is not decorating. It is part of building an installation that still looks correct years from now.
Gathering Your Tools and Prioritizing Safety
You are on the ladder, the canopy is in one hand, and the missing screwdriver is on the counter across the room. That is how rushed installs turn into crooked fixtures, scratched finishes, and unsafe decisions. Pendant lights reward preparation because every step overhead is harder to correct once the fixture is partially assembled.
I look at prep the same way we look at product engineering. Small choices at the start determine how well the fixture performs years later. The right tools protect wire insulation, preserve the canopy finish, and help the pendant hang true instead of developing a subtle tilt that bothers you every time you walk into the room.
The Essential Tool Kit
A tight tool kit handles most pendant installations without cluttering the job:
- Screwdriver set: Use the correct tip size for mounting screws, terminal screws, and canopy hardware to avoid stripping heads.
- Wire strippers: Clean cuts make stronger connections and reduce the chance of nicking conductors.
- Tape measure: Confirm drop length and fixture alignment before the install starts.
- Voltage tester: Check that the circuit is de-energized before touching any wire.
- Stable ladder: A secure footing helps you keep both hands under control at ceiling height.

A few extras save time on real jobs: a small parts tray for screws, painter's tape to mark centerlines or protect delicate finishes, and a level to confirm the fixture is not drifting off axis. If you are installing a heavier or more complex fixture elsewhere in the home, this chandelier hanging guide covers the added support and handling considerations.
Safety Is Part of Quality
Start at the breaker. Shut off the correct circuit, then verify with a non-contact tester before handling the fixture wires or the box. In a busy household, label the breaker so no one flips it back on mid-install.
Good safety habits also produce a better finished result:
- Wear safety glasses: Ceiling dust, old insulation, and small bits of hardware fall fast.
- Keep fasteners organized: A tray or cup prevents dropped screws and last-minute substitutions that never fit quite right.
- Stop if the box or wiring looks questionable: Brittle insulation, movement at the box, or signs of overheating call for a licensed electrician.
- Check permit rules if the job is expanding: Replacing a fixture is one thing. New wiring or box relocation may trigger local requirements. Review HomeProBadge's guide on building permits before you open the ceiling.
Once the safety basics are handled, it's worth having a damp-rated, easily adjustable option in mind for the actual fixture. For readers comparing fixture specifications before installation, the Orwell 1-light 10in Pendant in Pewter and Aged Brass shade is a damp location rated pendant that works with sloped ceilings, adjusts from 16" to 130" in hanging height, measures 10"W x 8.5"H x 10"D, uses one E26 medium base bulb up to 100 watts, and is priced at $139.99.
Mounting and Wiring for a Secure Fit
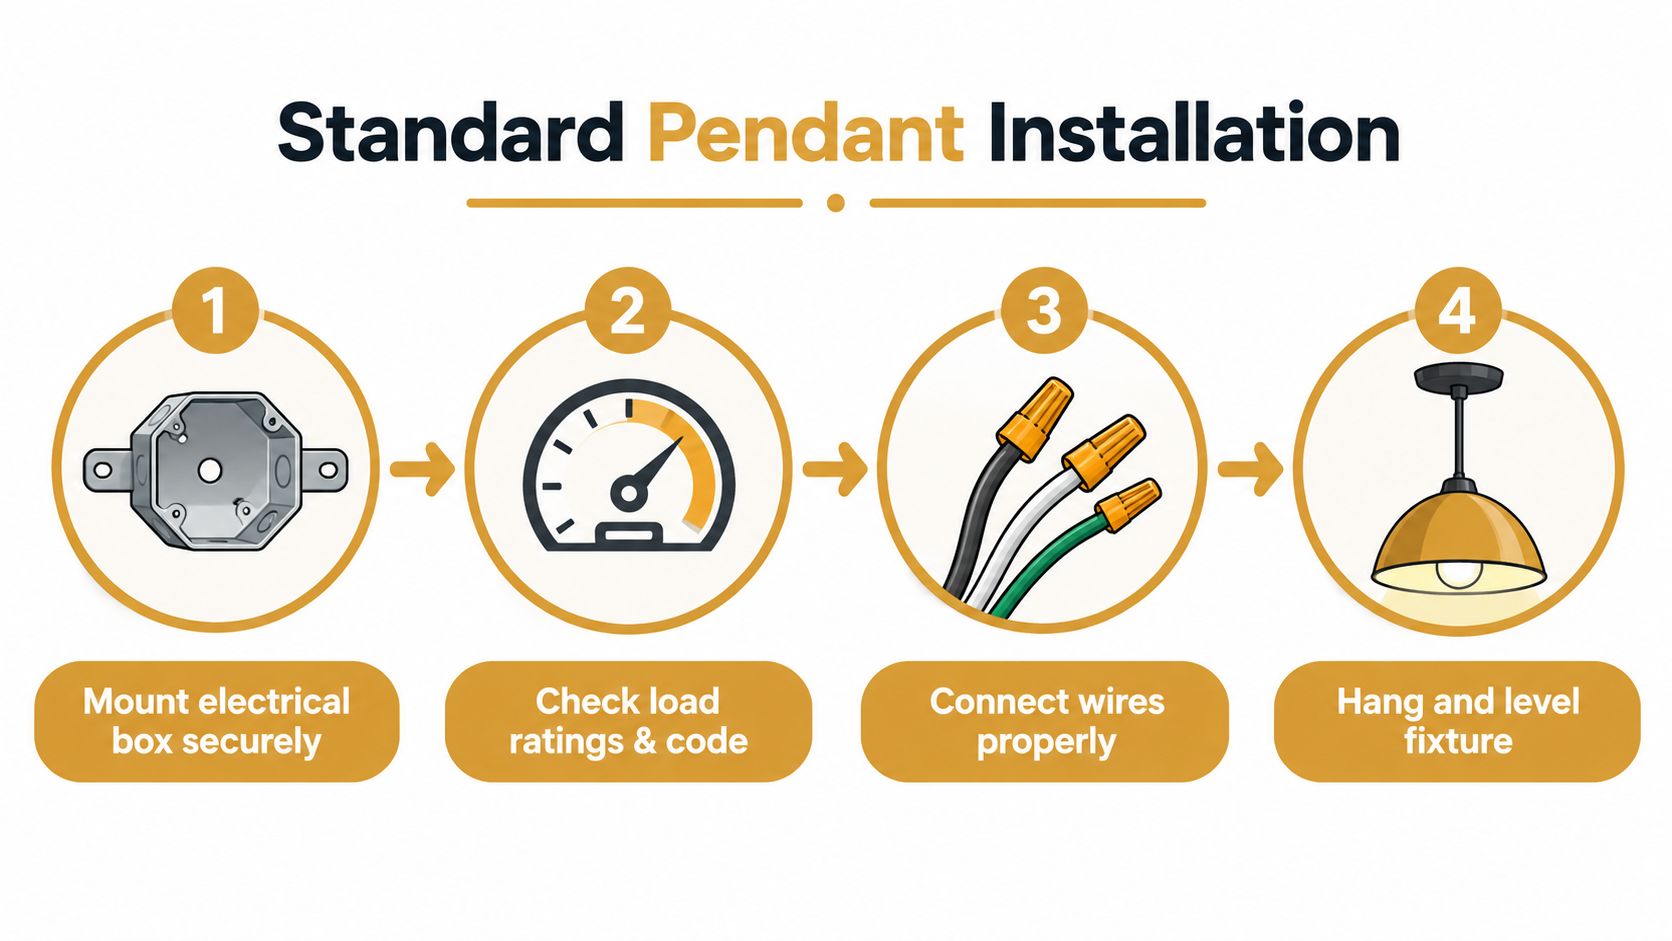
A pendant can look perfectly chosen and still fail in the last 30 minutes of installation. The difference is usually hidden above the canopy. A box that holds firm, a bracket that sits flat, and wire connections made with discipline are what keep a fixture straight, quiet, and reliable for years.
Secure the Bracket Before Anything Else
Start by removing the old fixture and checking whether the existing electrical box is rated and positioned for the pendant you are installing. If the box shifts under hand pressure, sits proud of the ceiling, or leaves the bracket twisted, fix that now. Small alignment errors show up later as a crooked stem, a canopy gap, or a fixture that never hangs quite true.
Ceiling material changes the job. Drywall usually gives a clean working surface. Older plaster requires slower drilling and lighter torque on screws because one hairline crack can turn a one-hour install into patching and paint. On sloped ceilings, use a fixture or canopy designed for that angle so the pendant drops vertically instead of pulling to one side.
Weight matters too. A single-light pendant is often straightforward, but larger overhead fixtures ask more from the box and support system. For a related example, Golden Lighting's guide to hanging chandeliers securely shows how the same mounting principles apply when size and spread increase.
Make Clean, Correct Wire Connections
Good wiring is mechanical before it is cosmetic. Match black to black, white to white, and connect the ground wire to the fixture grounding point or the house ground conductor. Then make each connection tight enough that it stays tight after years of heat cycles, vibration, and routine bulb changes.
A few habits separate a durable install from one that causes callbacks:
- Strip only the required length: Excess copper inside the box raises the chance of contact where it should not happen.
- Use properly sized wire connectors: If the connector is too large or too small, the splice can loosen over time.
- Tug-test every splice: A firm pull confirms the conductor is captured.
- Fold wires back with intention: Neat wire placement reduces stress on the splices and gives the canopy room to sit flush.
I treat this stage as product quality in the field. In manufacturing, the best finish in the world cannot compensate for weak internal assembly. Installation works the same way.
Know When the Ceiling Isn't Set Up for a Pendant
Some rooms do not have a junction box where the light belongs. In those cases, forcing a hardwired pendant into the wrong location usually creates a room that looks off-balance every time you walk into it. Many DIY installers run into this problem, especially in rentals, older homes, or spaces where the joists and existing wiring dictate placement.
One practical workaround is a decorative ceiling hook with a swag kit that routes the cord intentionally to a nearby power source. That approach can work well if the cord path is clean and the hook placement supports the room's geometry instead of fighting it. The better decision is the one that respects both the structure of the home and the visual center of the space.
If the project expands into new wiring, box relocation, or other work that may need approval, revisit the permit guidance noted earlier before opening the ceiling.
A video view can help if the sequence still feels abstract:
Adding the Finishing Touches and Pro Tips
Once the fixture is mounted, the character of the pendant starts to show, and installation shifts from electrical work to visual editing. The shade, bulb, dimmer response, and final drop all shape how the room feels at night.
Refine the Fixture, Then Refine the Light
Install any glass, shade, or decorative component carefully and with clean hands. Finishes and materials can be more delicate than they appear, especially on fixtures where the shade is the focal point rather than a secondary detail.

A pendant's scale still matters at this late stage. If you want a second way to check your sizing beyond the width-to-surface ratio covered earlier, designers also use a room-scale formula: add the room's length and width in feet, then convert that total to inches for an approximate fixture diameter. A 10' x 12' room becomes 22, suggesting a 22-inch fixture diameter, as outlined in City Lights SF's sizing guide. This method works best for a single statement pendant centered in a room; for islands and multi-pendant layouts, the surface-proportion rule from earlier is the more reliable check.
Use a Dimmer if the Fixture Supports It
A pendant without dimming is often stuck doing one job. A pendant on a dimmer can move from task lighting during prep to a softer setting for dinner or evening cleanup. That flexibility makes a room feel more considered.
Pro Tip: Before the canopy is fully tightened, turn the fixture on and test the light level in real conditions. Daylight hides placement and glare problems that show up immediately after dark.
Bulb choice matters just as much as fixture choice. The shape of the shade, the openness of the bottom, and the finish inside the fixture all affect how light spreads. Golden Lighting's bulb selection tips help match brightness and color feel to the fixture style and room use.
Style Choices Should Support the Way You Live
For homeowners, that often means classic silhouettes and finishes that stay versatile as furnishings change. For creatives, YEP by Golden's mix-and-match approach makes it easier to personalize shade and finish combinations. For professionals working at the showroom or specification level, Ziva pieces reward tighter attention to proportion, finish interplay, and architectural context.
The strongest finish decisions share one trait. They don't ask the pendant to carry the whole room. They let the pendant complete it.
Troubleshooting Common Installation Issues
You flip the switch, step back, and something feels off. The pendant works, but the line is crooked, the light flickers, or the layout looks right on paper and wrong in the room. These are usually finish-stage problems, not full installation failures, and they respond well to methodical checks.
If the Pendant Hangs Crooked
A pendant that hangs out of plumb usually points to one of four causes: a canopy that is not sitting flat, mounting hardware installed slightly out of level, uneven chain or cord tension, or a fixture body assembled under twist.
Start at the ceiling and work down. Check that the canopy is flush. Check that the mounting strap is level. Then look inside the canopy for a cord or chain pulling to one side. I tell teams to solve this in that order because the visible symptom is often lower on the fixture than the actual cause.
A few reliable fixes:
- Re-seat the canopy: Uneven screw pressure can tilt the entire fixture.
- Straighten the cord or chain path: Side tension can pull the pendant off center.
- Verify bracket alignment: A small error at the box becomes obvious once the fixture is hanging at full length.
- Inspect the fixture body itself: Some shades and stems can be threaded slightly off during final assembly.

If the Light Flickers or Won't Stay Steady
Flicker usually comes from three places. A loose electrical connection, a bulb that is not fully seated, or a dimmer and fixture that do not speak the same electrical language.
Turn off power before opening anything. Then check wire connectors, fixture leads, grounding, and the bulb socket. If the flicker started after a dimmer was added, test the fixture on a standard switch if possible. That isolates the control from the fixture and saves time.
A stable pendant comes from disciplined installation. Tight connections reduce heat buildup, good grounding improves safety, and compatible controls protect long-term performance. That is the difference between a light that looks finished on day one and a system that still performs cleanly years later.
If the Layout Feels Wrong Over a Complex Island
This happens often with L-shaped, angled, or extra-long islands, where renovators struggle with pendant placement. The mistake is usually treating the countertop like a simple rectangle when the room is asking for a more functional layout.
For a complex island, center pendants by use, not by geometry alone. The prep area, seating edge, sink location, and primary sightline all matter. A mathematically even layout can still feel wrong if one pendant lands over a stool back, blocks a viewline, or crowds the sink zone.
Driven by Decor's guidance on pendant height and placement supports the same principle. Good placement accounts for how people see and use the space at normal eye level.
From a manufacturing and operations standpoint, long-term value becomes evident. A well-placed pendant is less likely to be bumped, visually corrected later, or replaced because it never felt right. Good installation protects the fixture, the finish, and the investment.
Your Lighting Questions Answered
Can cord length be adjusted after installation
Often, yes. The fixture has to be built for adjustment, and there has to be enough slack above the canopy to shorten or re-drop the cord cleanly. Cord-hung pendants usually give you more flexibility than rigid stems, but every change should preserve strain relief, a neat cord path, and a canopy that sits flat to the ceiling.
From a build-quality standpoint, this matters more than homeowners expect. A rushed adjustment can leave twisted conductors, uneven suspension, or visible cord memory that makes the fixture look off even if it is technically centered.
Should matching pendants always be used over an island
Use matching pendants when the room needs rhythm and order. Use mixed fixtures only when they share a clear design logic, such as a common finish, scale, or visual weight.
I have seen plenty of installations where identical pendants were the right call because the cabinetry, counter material, and sightlines already carried enough variation. In other kitchens, a curated mix worked better because the architecture needed softness instead of repetition. The standard is balance, not strict symmetry for its own sake.
What if the existing electrical box isn't where the pendant belongs
Stop before you hang the fixture. A misplaced box usually creates a compromise you will notice every day, especially over islands, nightstands, and dining tables where alignment is easy to read.
The long-term fix is often to relocate the junction box with a licensed electrician. In some applications, a hook-and-cord setup can solve the visual alignment problem if local code allows it and the fixture is designed for that method. The goal is not just to get the light on. The goal is to place the load where the room and the hardware can support it properly for years.
Is a pendant enough on its own
Sometimes. Often, it is one layer in a better lighting plan.
A pendant handles focal light and task light well, but many rooms still need ambient fill and secondary sources to avoid harsh contrast and dead zones. In practice, that may mean recessed cans in a kitchen, sconces in a hallway, vanity lights in a bath, or a statement piece from a chandelier collection in an adjoining dining area. For projects that carry the same design language outside, it also helps to compare finishes and scale with outdoor lighting.
Good pendant installation is not only about getting the drop right. It is about building a lighting system that looks intentional, performs reliably, and still feels correct after the room changes around it.


Share:
Vanity Lighting Plug in: Modern Style Guide